If you want to use a test credit card go here:
https://developer.authorize.net/hello_world/testing_guide.html
To use Authorize.net for accepting payments on the store, you will need to enter in a couple of unique items from your Authorize.net account.
When you are logged into Authorize.net:
1. Go to Account (top right)
2. Under the “Transaction Format Settings” section, select Silent Response URL and enter this URL into the box and click Submit:
storeurl/Plugins/PaymentAuthorizeNet/IPNHandler
IN 4.5 it is storeurl/Plugins/AuthorizeNet/IPNHandler

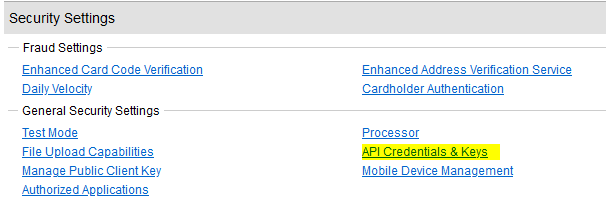
3. Then, go back to the Account heading (top right). Under the “Security Settings” section, select API Credentials and Keys
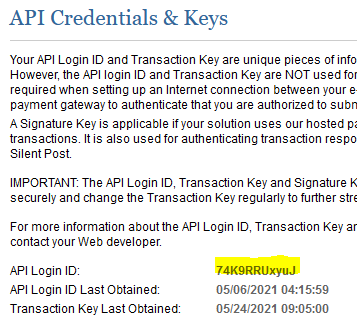
4. Copy the API Login ID and paste it into the “Login ID” field in your your site’s configuration panel, here:
Admin/PaymentAuthorizeNet/Configure
5. Select to create a new Transaction Key and click Submit.
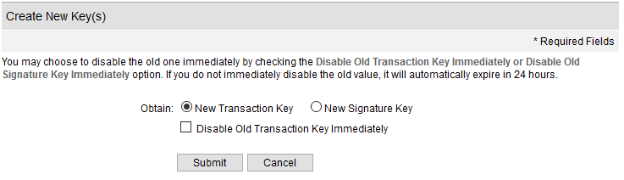
6. You may be asked to verify your pin by receiving an email. Once the verification has been performed, you will be provided with a Transaction Key. Copy and paste it into the “Transaction key” field in your site’s configuration panel as well.
Feel free to modify the settings to your business needs e.g. adding an additional fee for accepting credit card, and then click Save.
Was this article helpful?
That’s Great!
Thank you for your feedback
Sorry! We couldn't be helpful
Thank you for your feedback
Feedback sent
We appreciate your effort and will try to fix the article